Quick start
These short instructions describe how to use the NFC tags management service Taglme Link. You’ll learn how to create managed NFC tags and specify the content that the user will receive when interacting with these tags.
Prerequisites
To complete this function, you should have several NFC tags that support an NDEF record format (for example, with NTAG213, NTAG216 NFC chips).
About the Service
The service is a web application through which you can dynamically manage all NFC tag content. All tags are programmed only once. All further work on them occurs through the web application. You won’t need to re-encode them if you want to change what is displayed on the user’s smartphone when it interacts with the tag.
In addition to NFC tags, you can also use QR codes or Bluetooth Eddystone format tags.
Registration and Login
To start working with the web application, you need to open a link in your browser: https://link.tagl.me
If you do not have an account with the service, you’ll need to go to the registration page.
On the registration form, fill in the Username, E-mail, Password, Password Confirmation and tick the box to consent to the Terms of Use. Then click the ‘Register’ button.
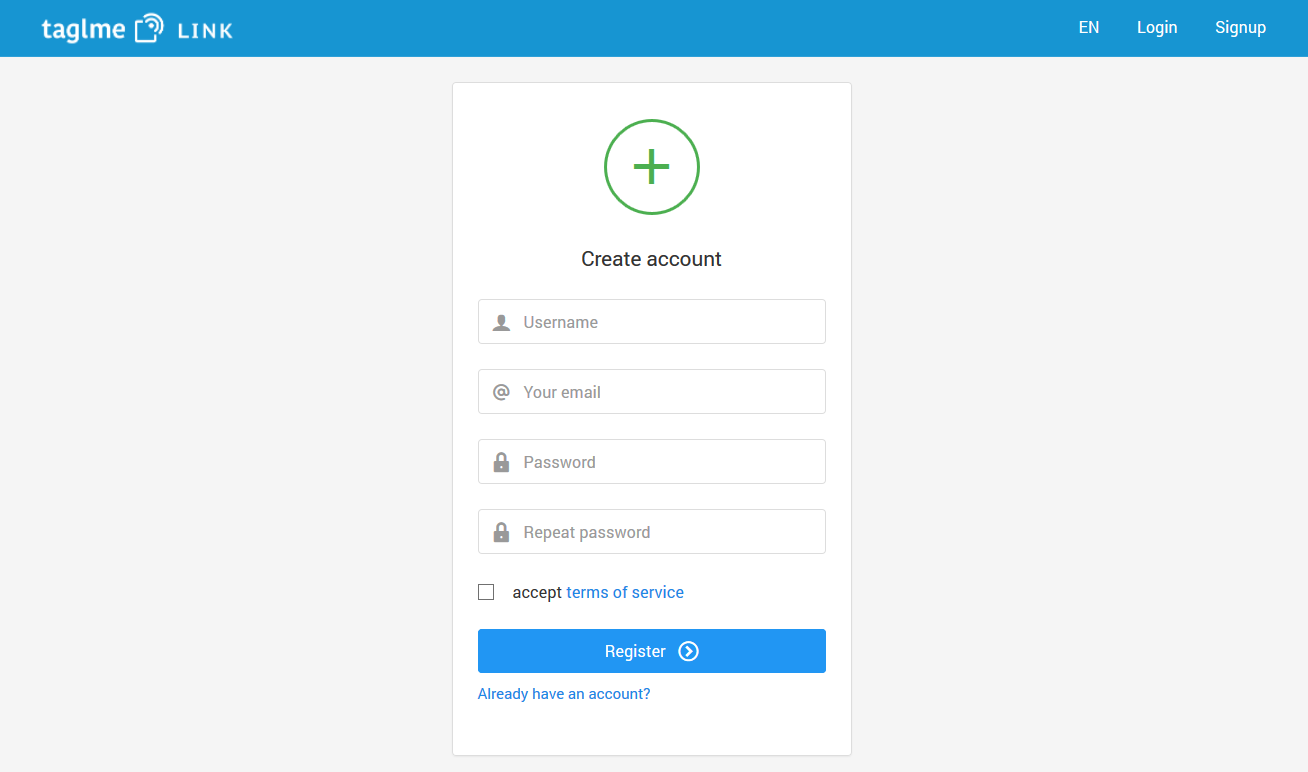
You will be send an email to confirm registration. Follow the link in the email to activate your account.
After activating your account, go to the login form and enter the E-mail and password that you specified when registering.
Create Project
A list of projects is displayed on the start screen of the application.
Click the button ‘Add Project’. On the list that appears, select the ‘New Project’ option.

Then, in the window that appears, specify the name of the project, for example ‘My NFC Project’ and click the ‘Create Project’ button.

Create Action
Using the menu bar on the left, go to the ‘Actions’ tab. Click the ‘Add Action’ button to create a new action.
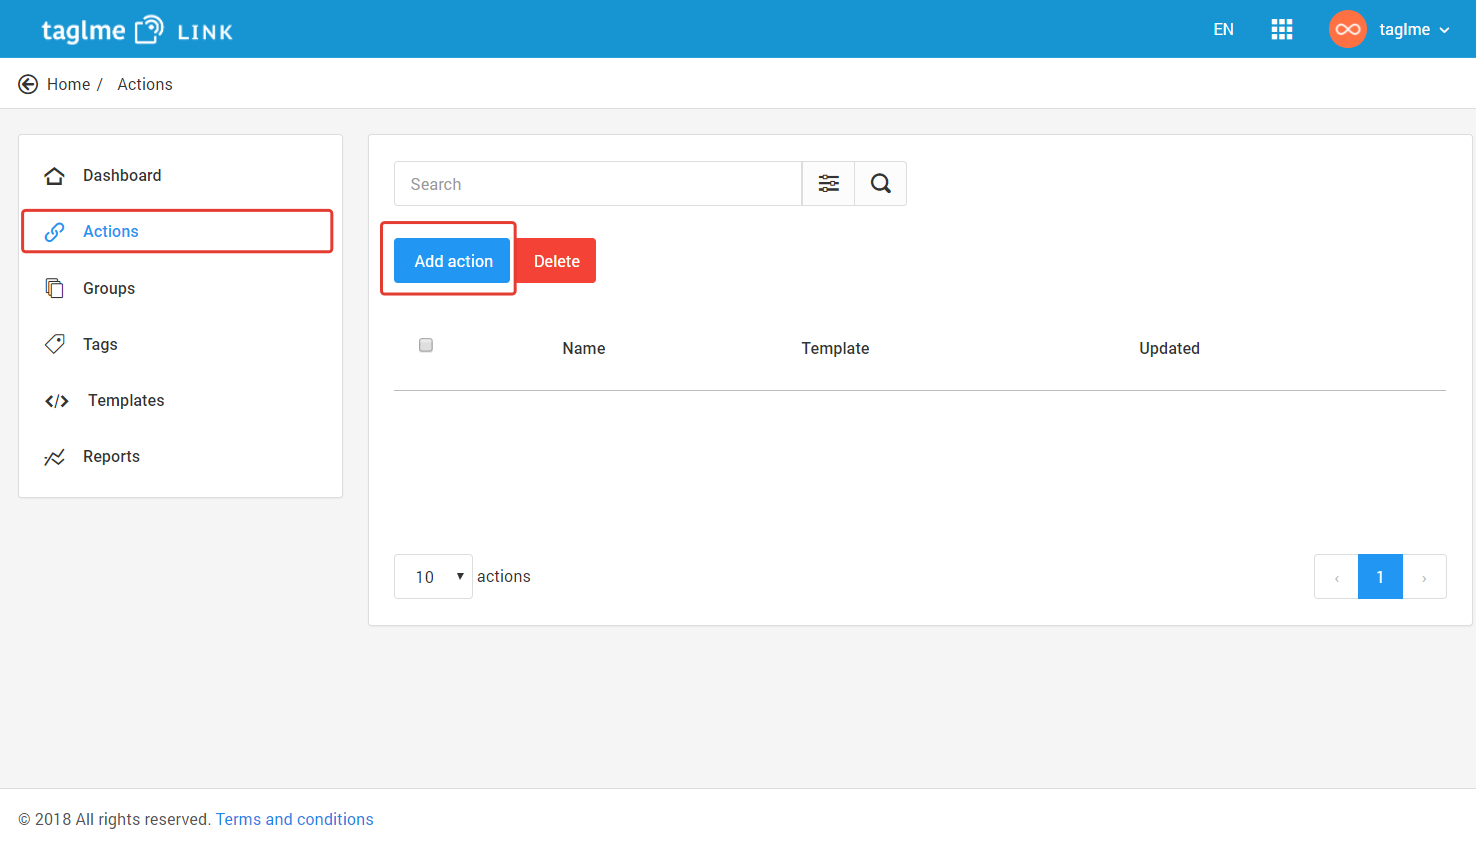
Actions represent the content that the user gets when interacting with the NFC tag.
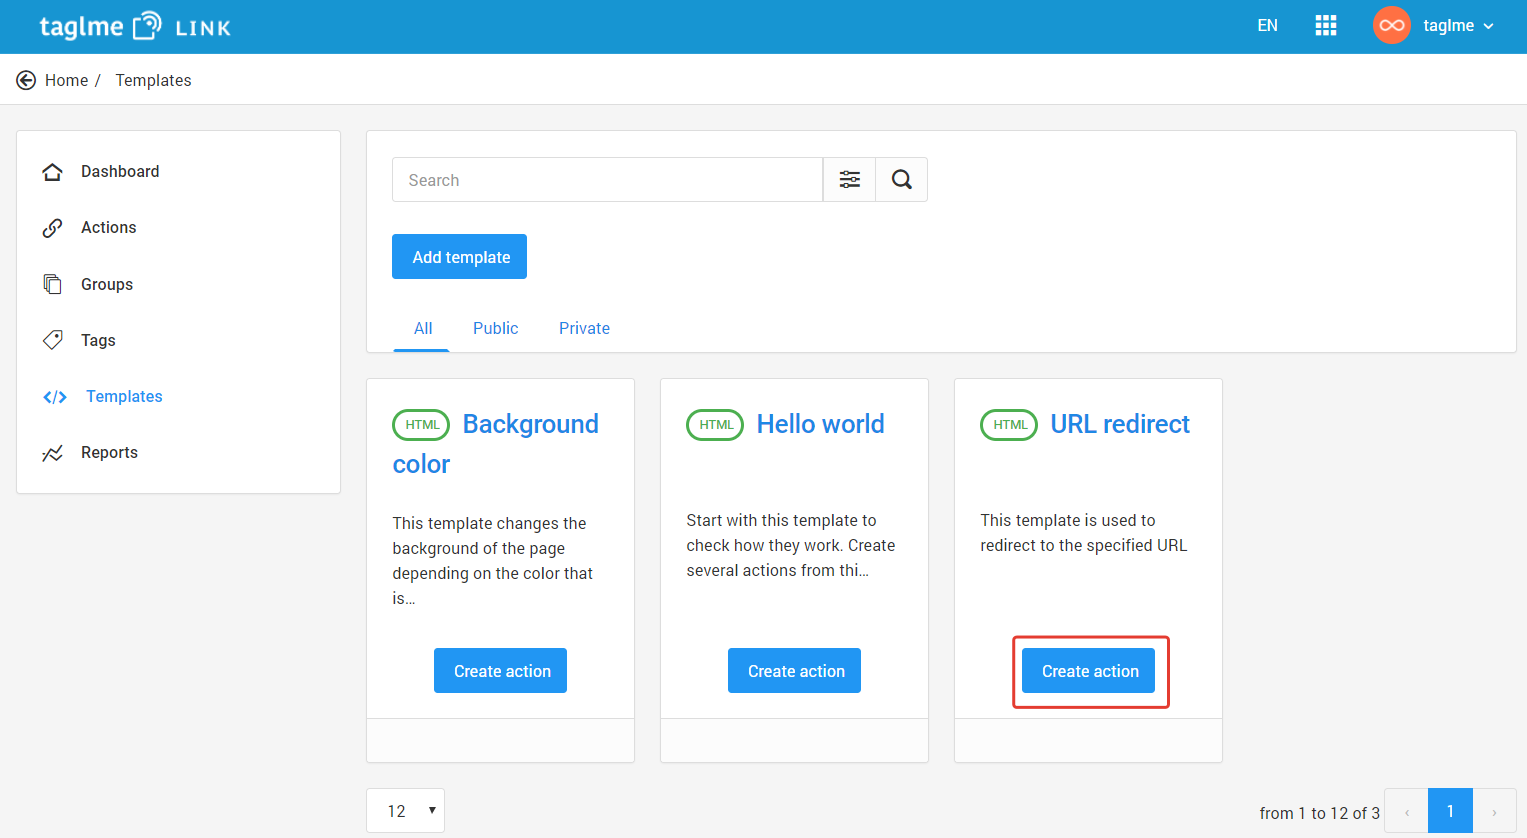
The template selection screen for the action is then displayed.
All actions are created based on templates. You can use public templates or create your own.
In the ‘URL Redirection’ template card, click ‘Create Action’. The application will then create an action that will redirect users to the selected web address.
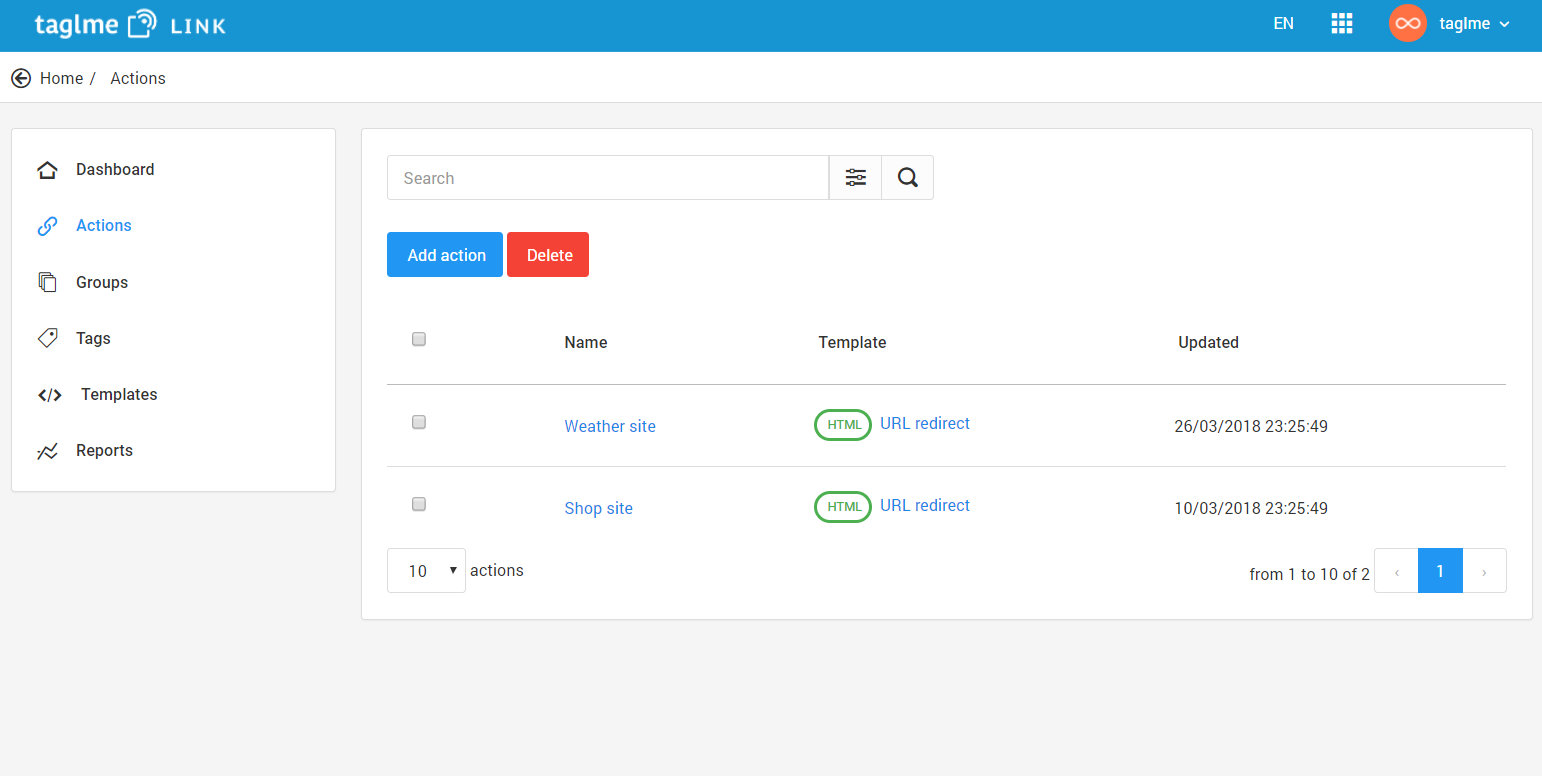
Enter ‘Weather Site’ in the Name field. In the URL field, enter the link below: https://weather.com/weather/today/l/USWA0395:1:US
Click the button ‘Add Action’.

In the same way, create one more action. Use the same URL redirect template. In the Action Name field, specify ‘Store Site’. In the URL field, enter the link below: https://amazon.com
Click the button ‘Add Action’.

The list now has two actions that you can apply to NFC tags.
Create Tag
Using the menu bar on the left, go to the ‘Tags’ tab.
Here you can create tags that will be used within the project.
Click ‘Add Tag’ and in the list that appears, select ‘NFC’.
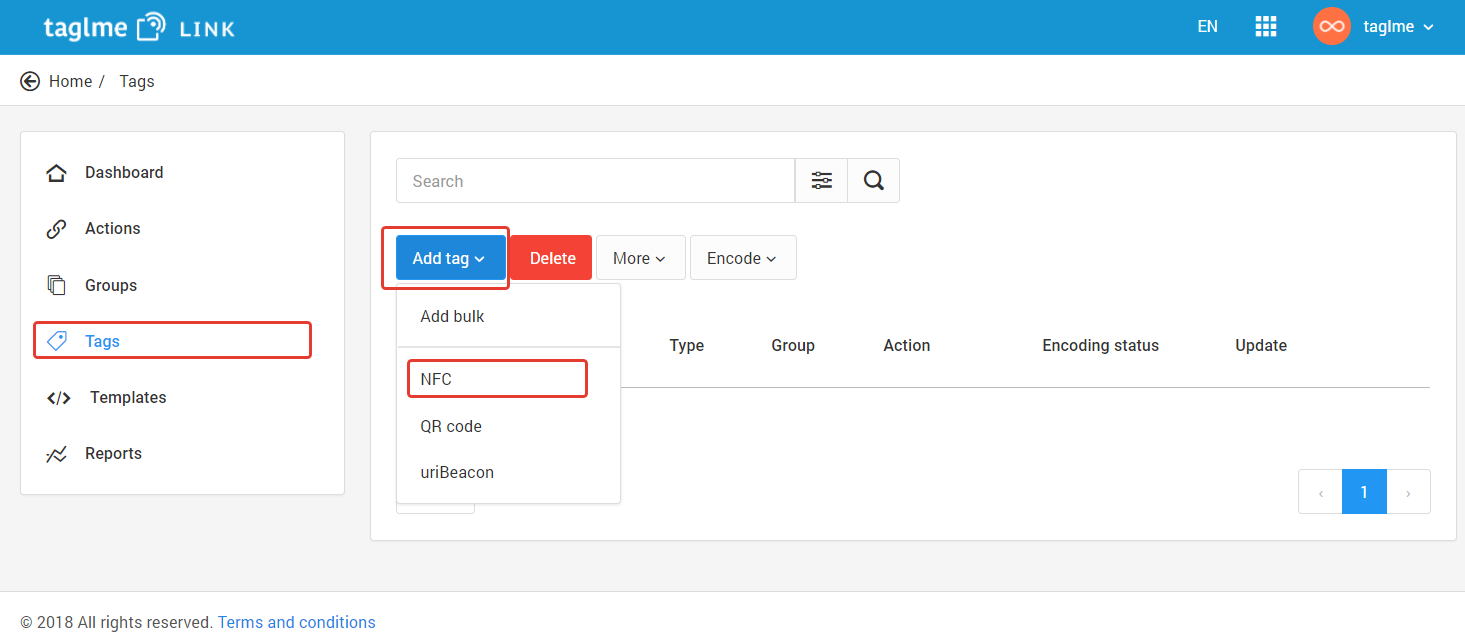
In the Name field, specify ‘My NFC Tag’. In the Action field select ‘Weather Site’. Click the Create button.
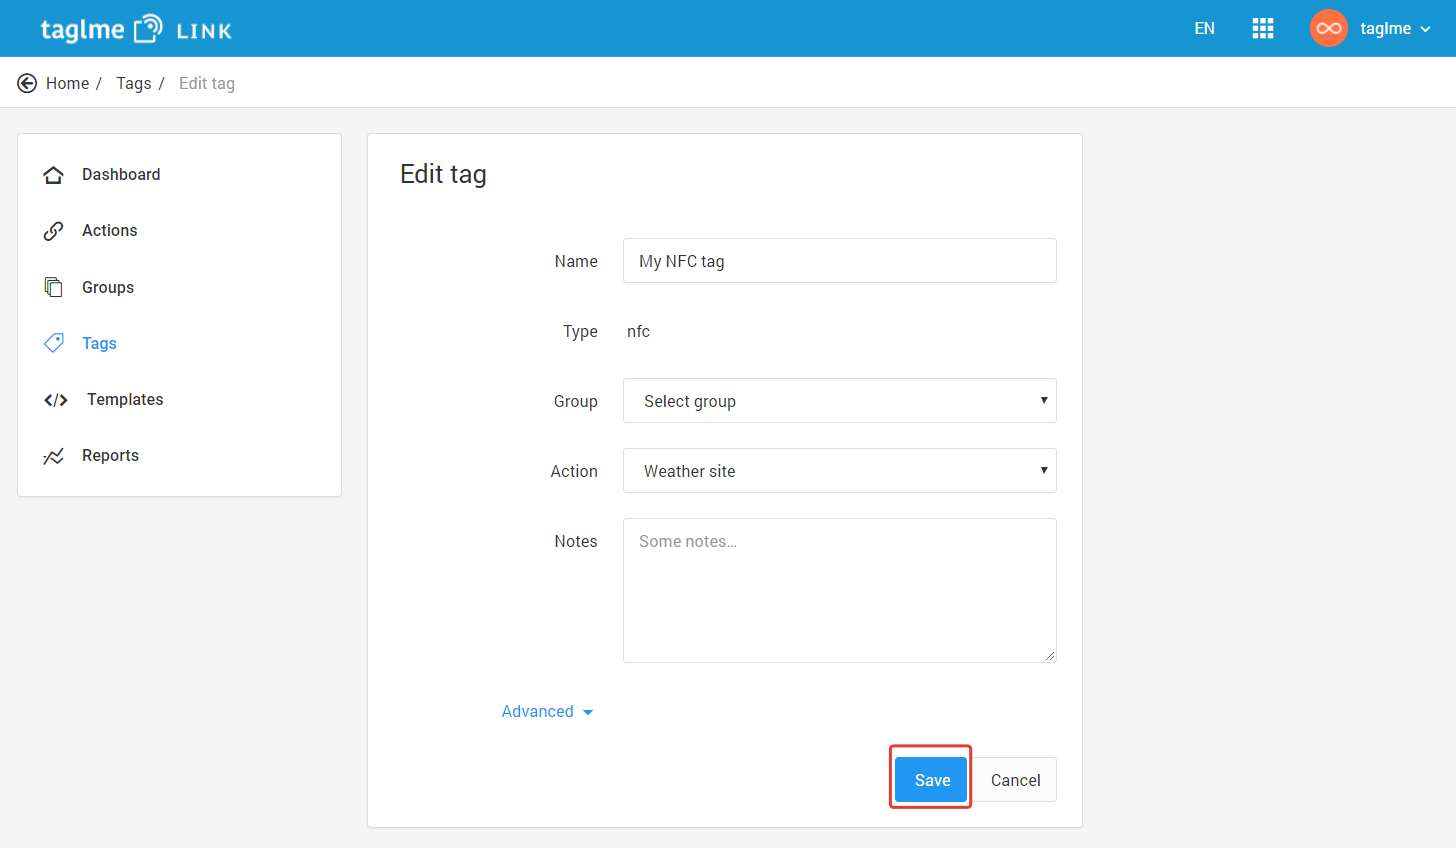
The created tag appears in the list.

Go to the page that contains tag information by clicking on its line.
On the Tag page, pay specific attention to the ‘Interaction URL’ parameter.
This web link should be written to the NFC tag to connect it to the Taglme Link application in order to make it manageable.
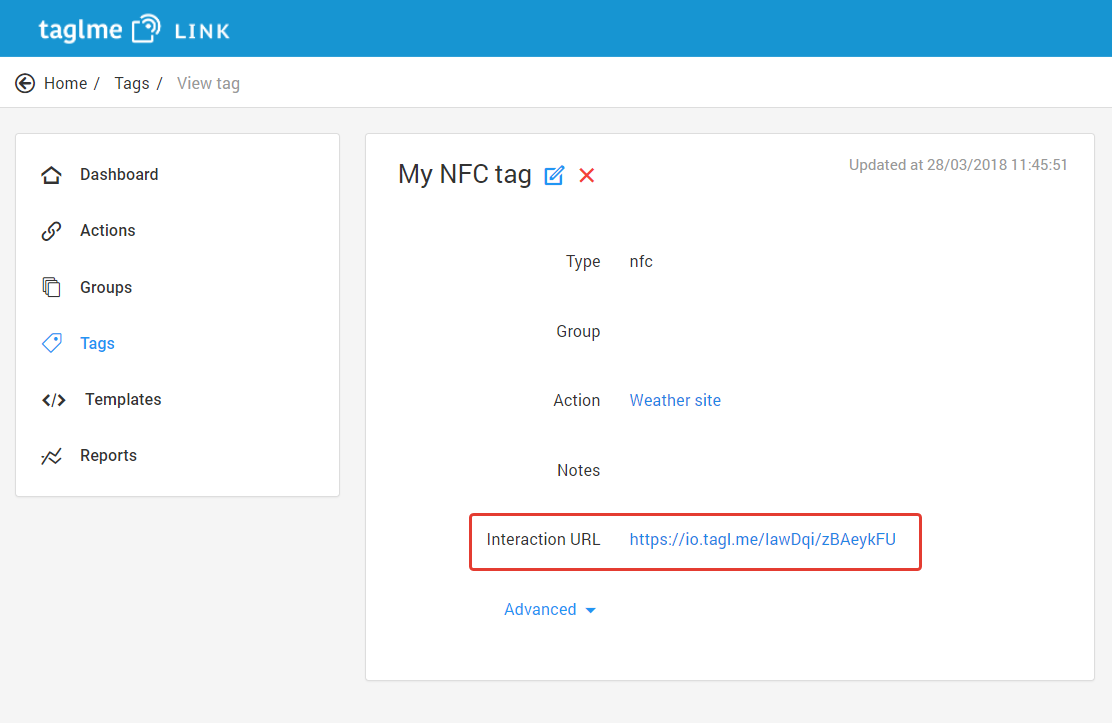
You can write this web link to the tag by using any program that uses NFC tag encoding.
Export Configuration
Here, we will use the Taglme Encoder application to encode an NFC tag.
Learn more about using Taglme Encoder.
On the left panel, go to the ‘Tags’ section.
Check the check box that shows the row with the created label. Click the ‘Encode’ button in the toolbar above the table of tags. In the list that appears, select the item ‘Export to Encoder Selected’.
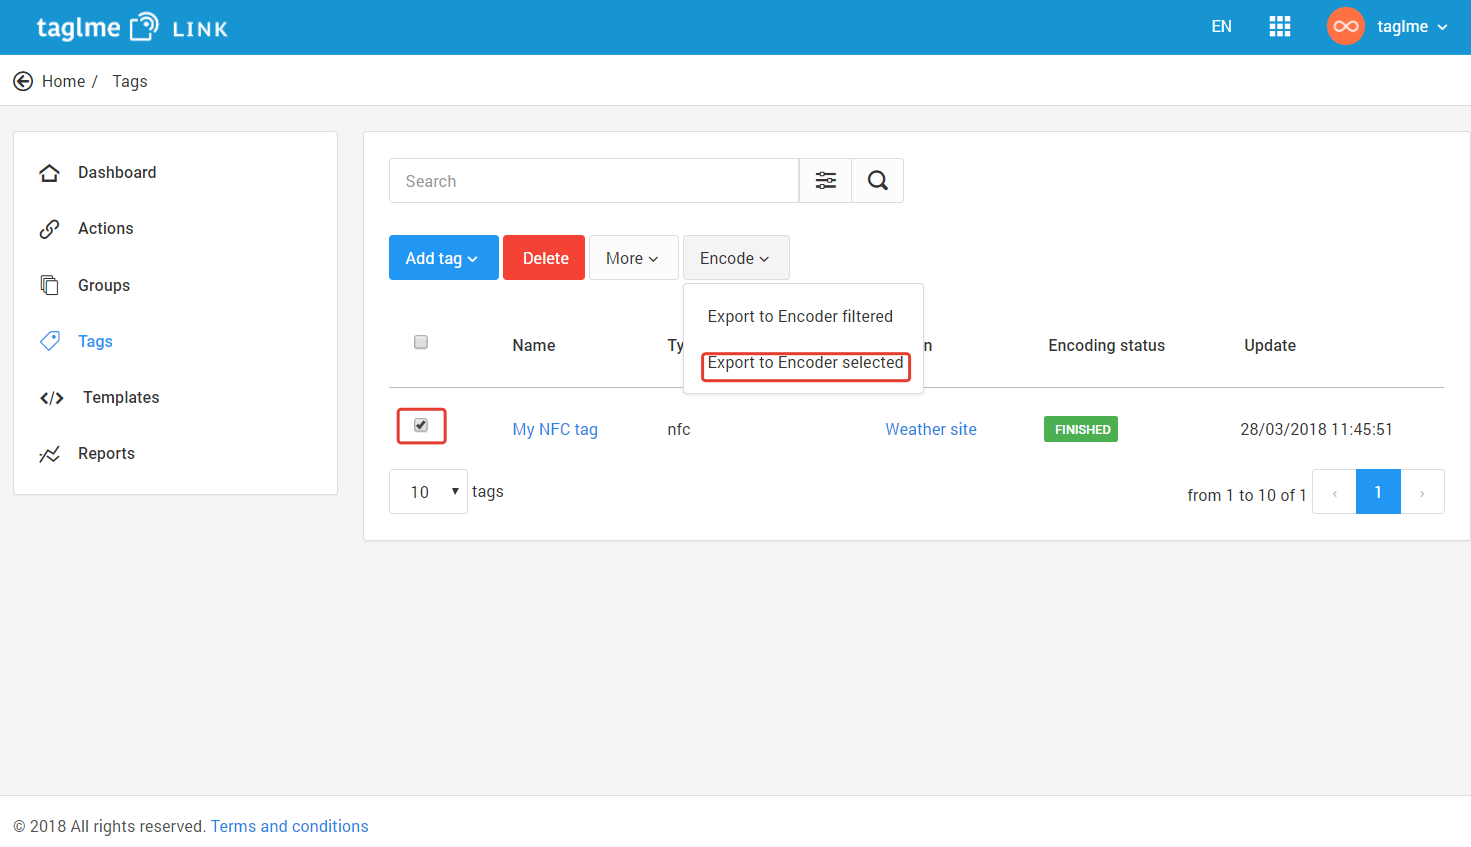
A message will appear that informs you the tag configuration was successfully exported to the NFC tag encoding application.
Installing a Mobile Application
The programming of NFC tags is performed by using Android application Taglme NFC terminal.
To install it, open the Google Play Store and type ‘Taglme’ in the search bar.
Go to the Taglme NFC terminal application page and install this on your smartphone.
Tag Encoding
Launch the installed Taglme NFC terminal application on your smartphone.
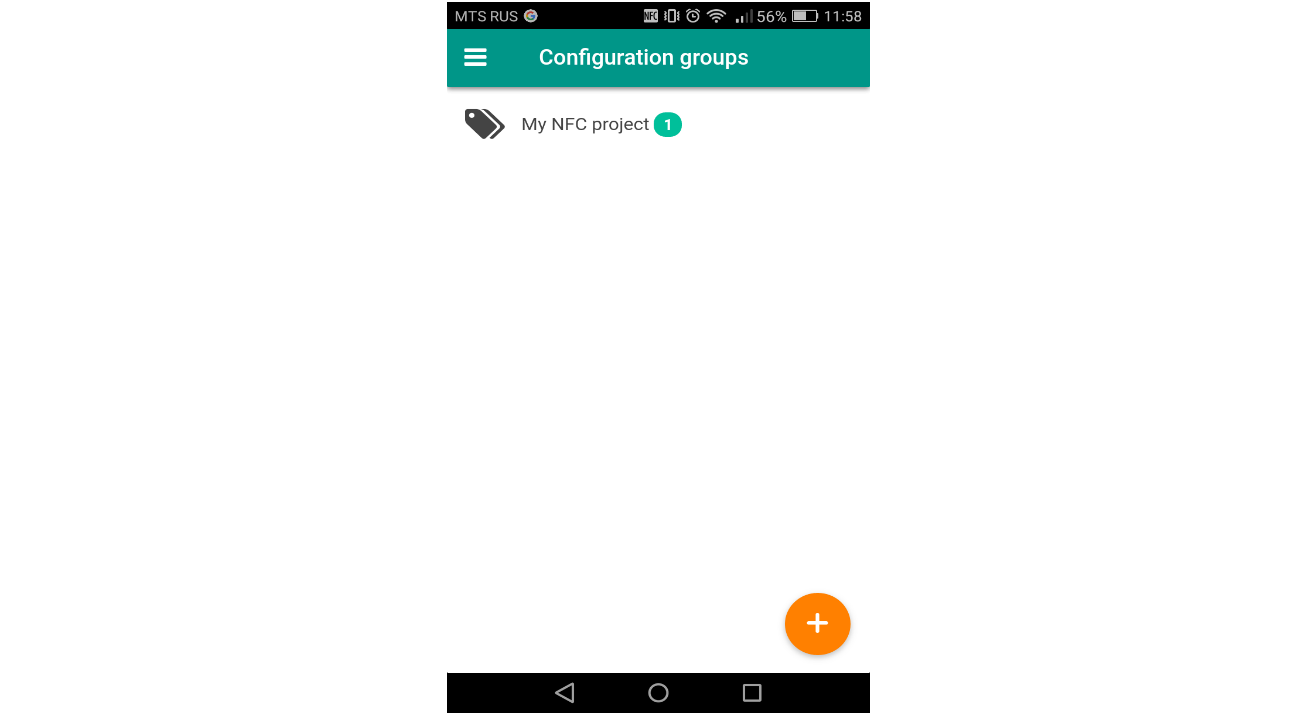
If you are logging into the application for the first time, you will need to enter your E-mail and password information the same as which was used when logging into the web application.
A list of groups created in your account will appear on the start screen. There will be a group with your project named ‘My NFC Project’. Go to this group.
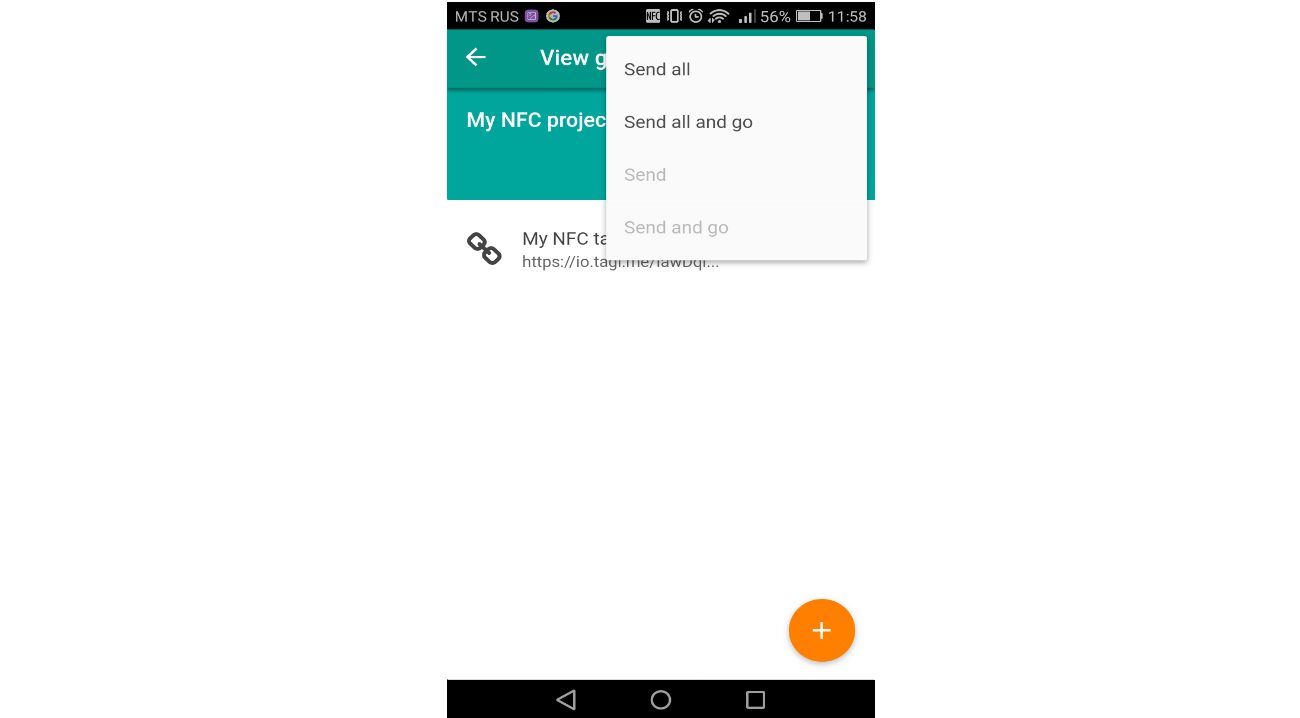
You will see a configuration named ‘My NFC Tag’. This was exported from the Taglme Link application.
Click the ‘Start’ button on the top toolbar of the screen. When the menu list appears, select “Send All and Go”.
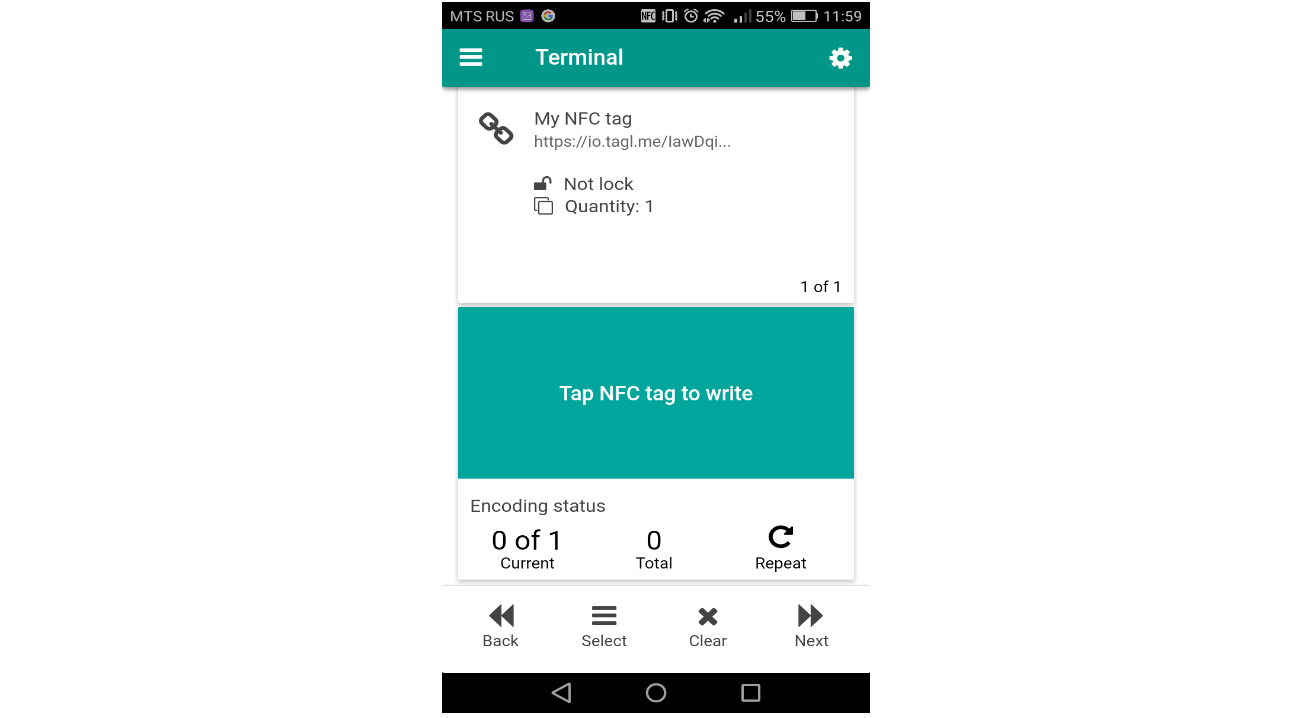
The terminal window opens. Tap the NFC tag to the smartphone to encode it.
Now the tag is connected to the Taglme Link application, and can be managed through it.
Try to test the NFC tag. Close the Taglme NFC terminal mobile application.
Tap the NFC tag on your smartphone. The web browser should now open on the smartphone, and a web page with a weather forecast will load.
Thus, the ‘Weather Site’ action you created on the web application has been activated.
Manage Content
Go back to the web browser and open your previous step page with the Taglme Link application.
Open your tag information page, and click the ‘Edit’ icon next to the tag name.

In the window that appears, change the ‘Action’ field to the ‘Store Site’ value. Click the Save button.
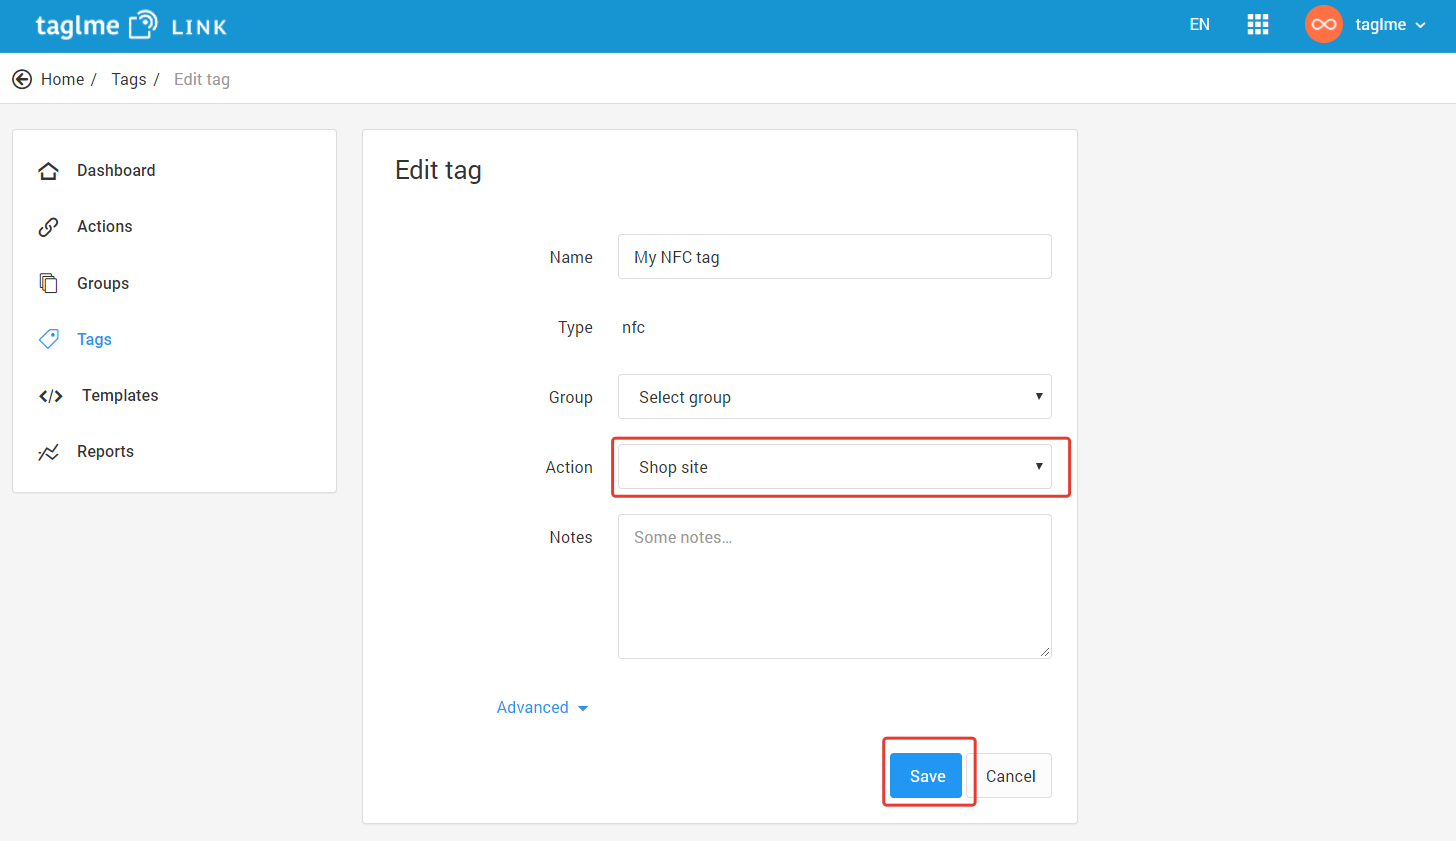
Now, when someone interacts with an NFC tag, the ‘Store Site’ action should be activated.
Get your smartphone and tap the same NFC tag. The web browser should open, and the web page with the website of the online store will be loaded.
By doing this, you have now changed the content that the user receives when interacting with the tag without re-encoding it.
Interaction Reports
Go back to the web browser and open your previous step page with the Taglme Link application.
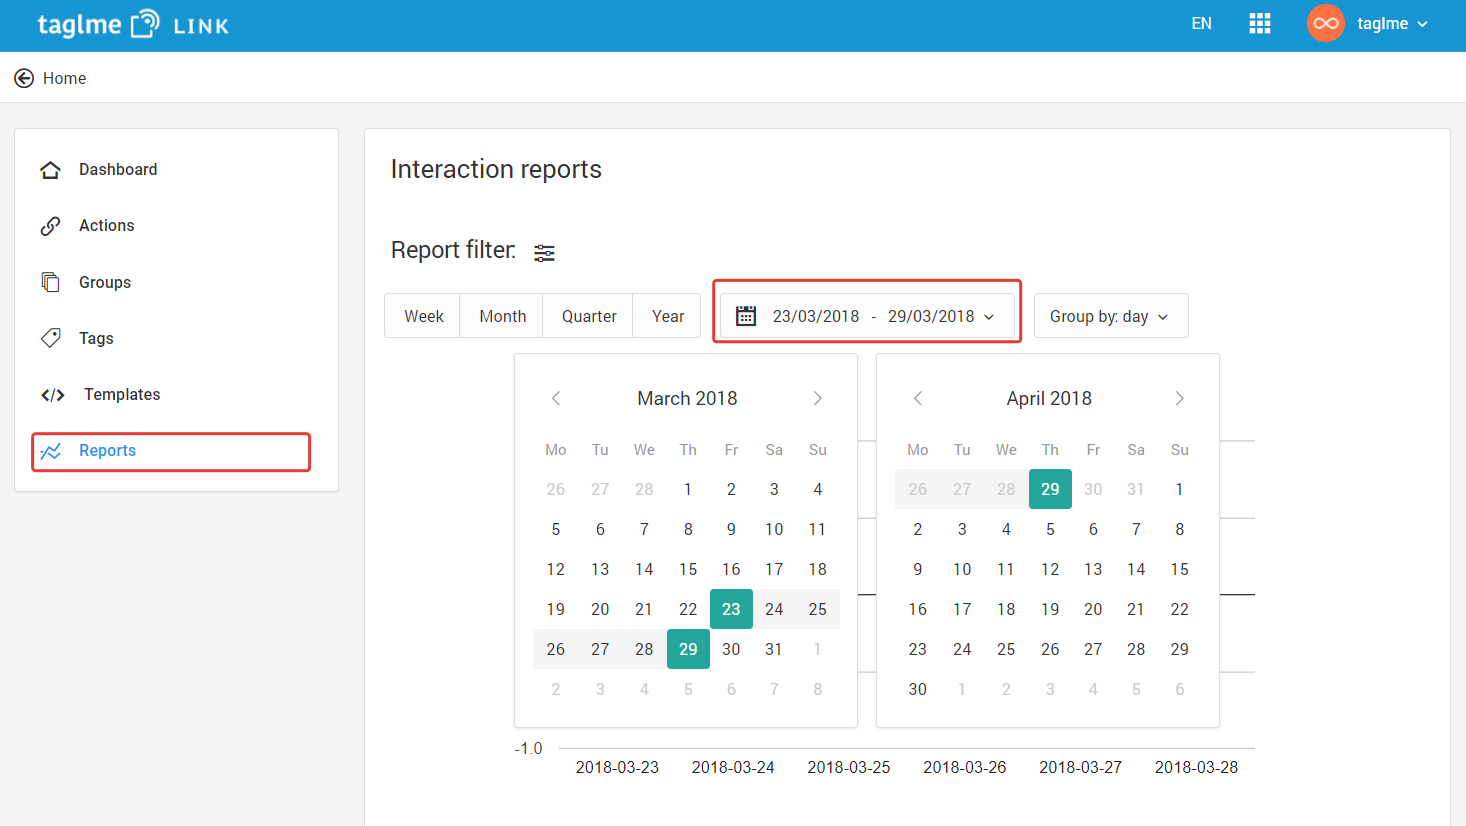
Use the left menu bar to go to the ‘Reports Tab’. All interactions with your tags are displayed here.
In the top panel of settings, select the date range, including the current date. A tag interaction report will be displayed.
More detailed instructions can be found in the User Guides and Tutorials section.