Quick start
In this short tutorial, you’ll learn how to use the NFC tag encoding service Taglme Encoder. You’ll learn how to create configurations for NFC tags and encode them.
Prerequisites
To complete this instruction, you should have several NFC tags with NDEF format support (for example, with NTAG213, NTAG216 chips).
About This Service
This encoder service consists of two parts - a web application and a mobile Android application.
By using the web application, you can create and edit NFC tag configurations.
You can work with the encoder using your computer or laptop (with a full-sized keyboard and monitor). This is especially useful if you need to encode many different NFC tags.
All created configurations are saved in database and can be reused for NFC tag encoding.
Registration and Login
Open this link below in the web browser in order to start the web application: https://encoder.tagl.me
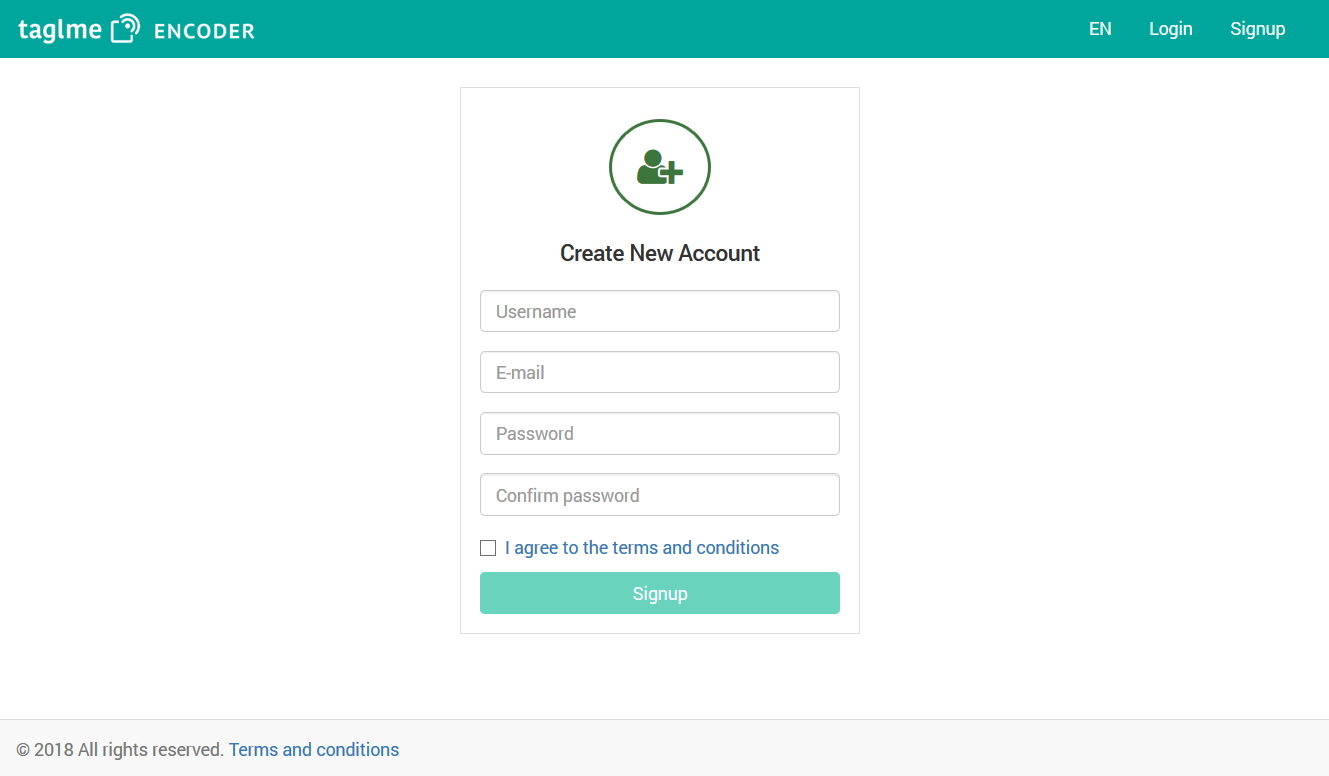
If you don’t have an account with this service, you’ll need to go to the registration page.
On the registration form, fill in the Username, E-mail, Password and Password Confirmation spaces, then tick the box to consent to the Terms of Use and finally click the “Register” button.
An e-mail will be sent to you to confirm your registration. Follow the link in the email to activate your account.
After activating the account, go to the login form and enter the E-mail and password that you specified when registering.

Create Group
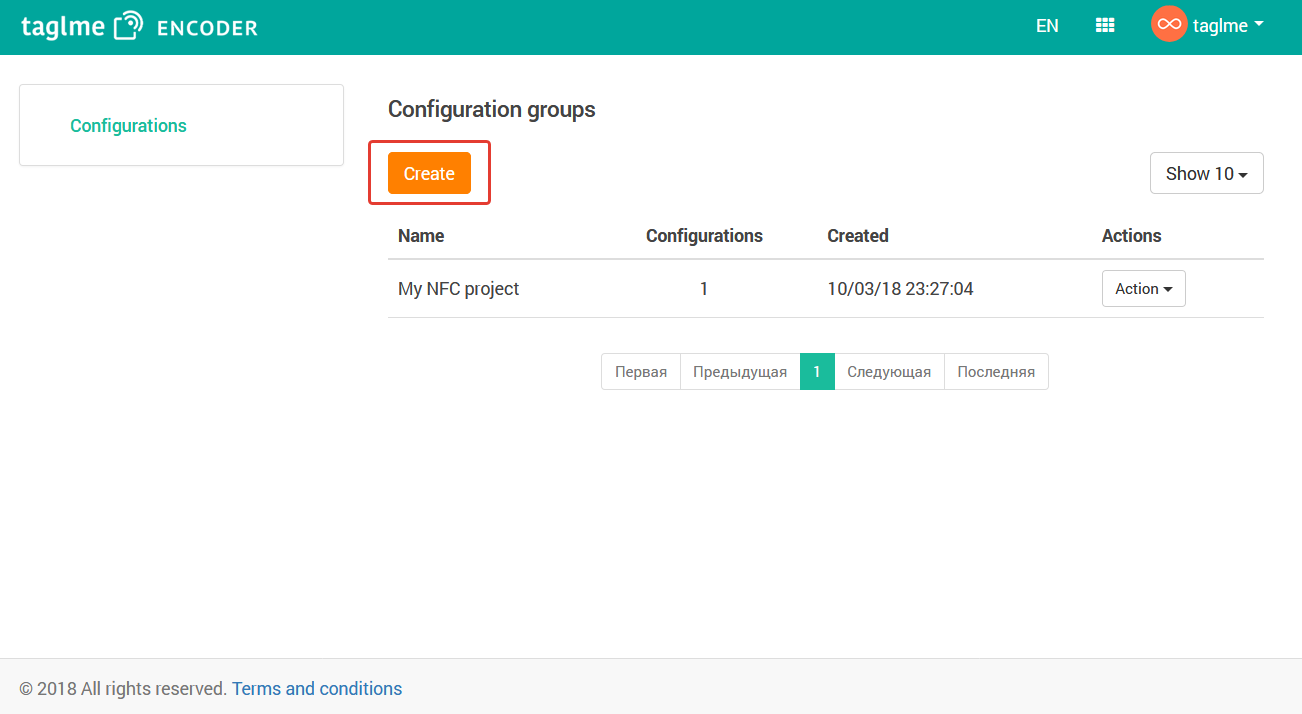
A list of groups with configurations for NFC tag encoding is displayed on the start screen.
Click the ‘Create’ button to create a new group.
In the window that appears, specify the name of the group. If necessary, you can also specify an additional description. Click the “Save” button
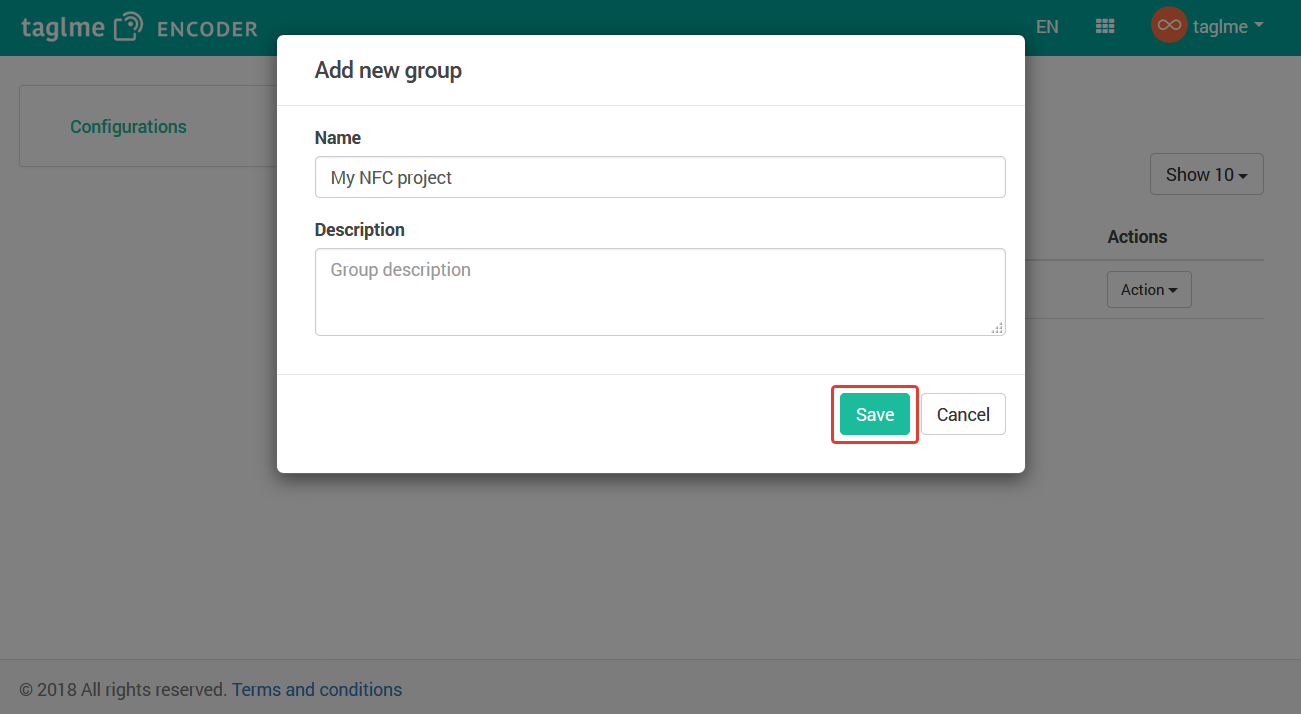
The group you’ve created will then appear in the list.
Create Configuration
Click on the name of the group you’ve created to open a configurations list.
Here, you can create configurations that you can then write to NFC tags.
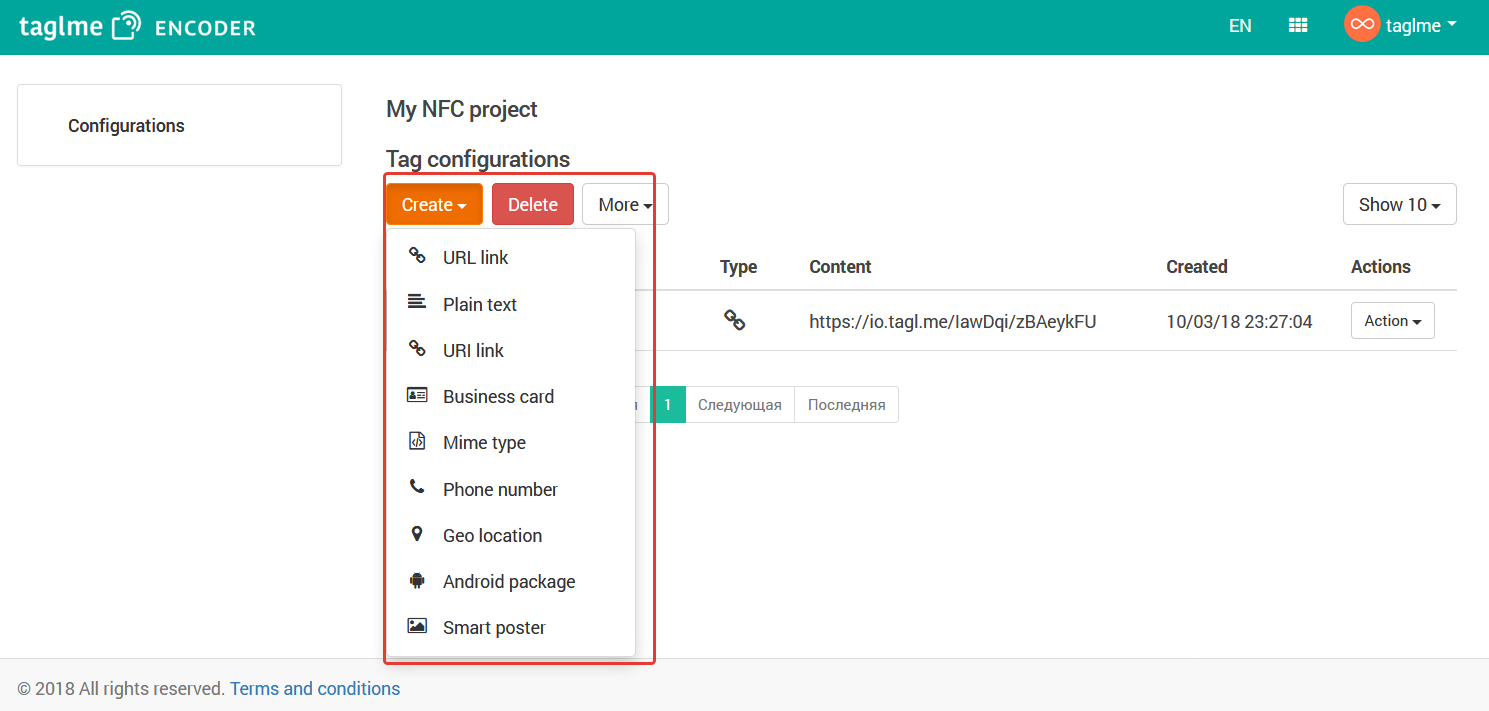
Click the “New” button to create a new configuration.
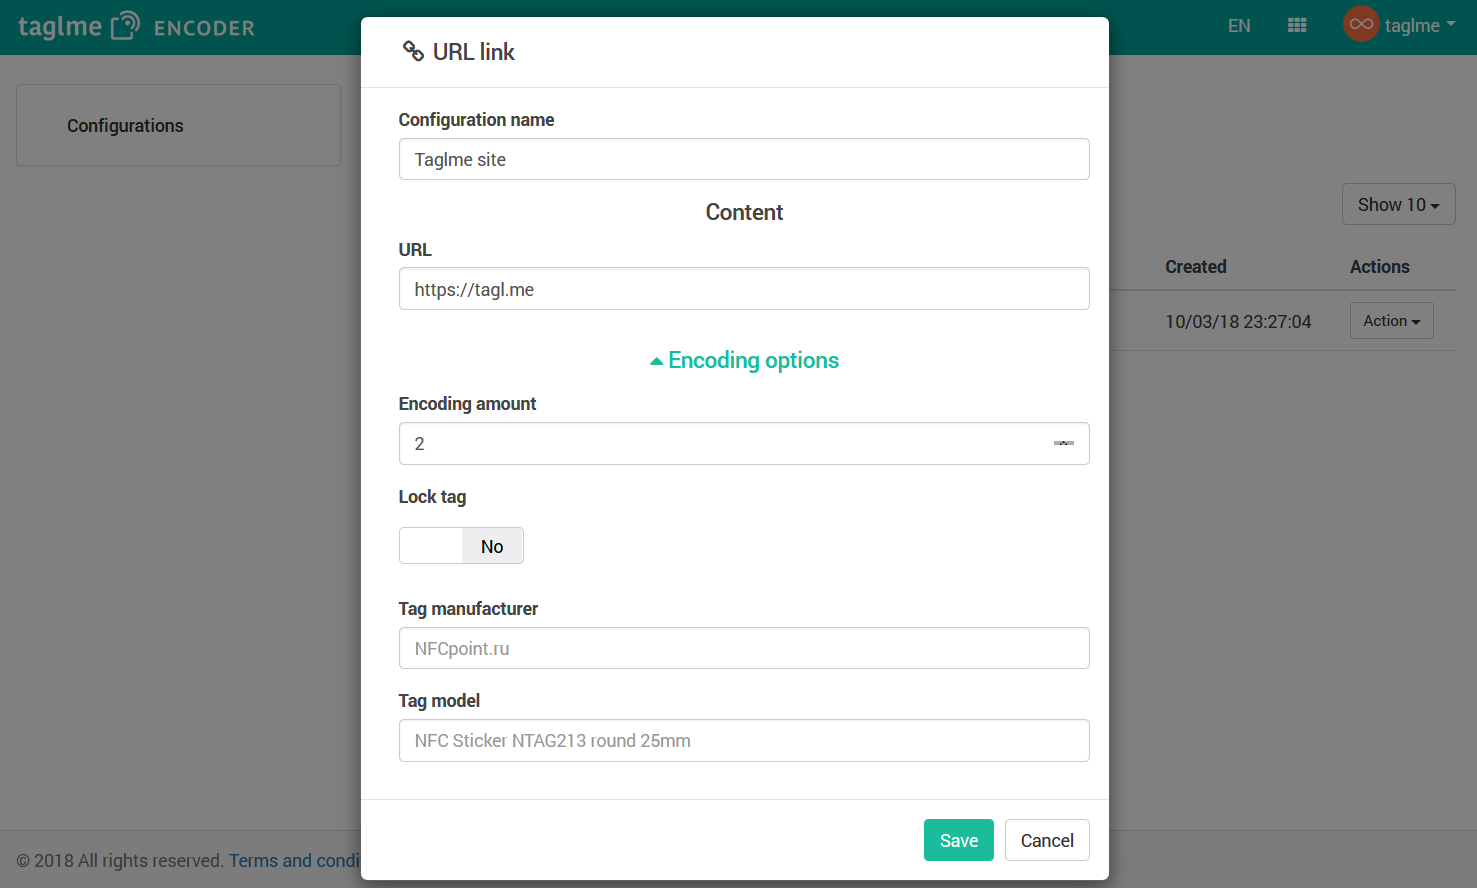
In the list that appears, select the type of record that you want to create. Select the “URL link” record.
In the URL field of the window that appears, enter the web link that you want to write to the NFC tag. You can also specify a name for this configuration. In the encoding options, fill in the ‘Encoding Amount’ field with the value 2. In the ‘Lock Tag’ field, specify whether you want to block the tag from overwriting. In this field (‘Lock Tag’), specify that no blocking is required.
Click the ‘Save’ button.
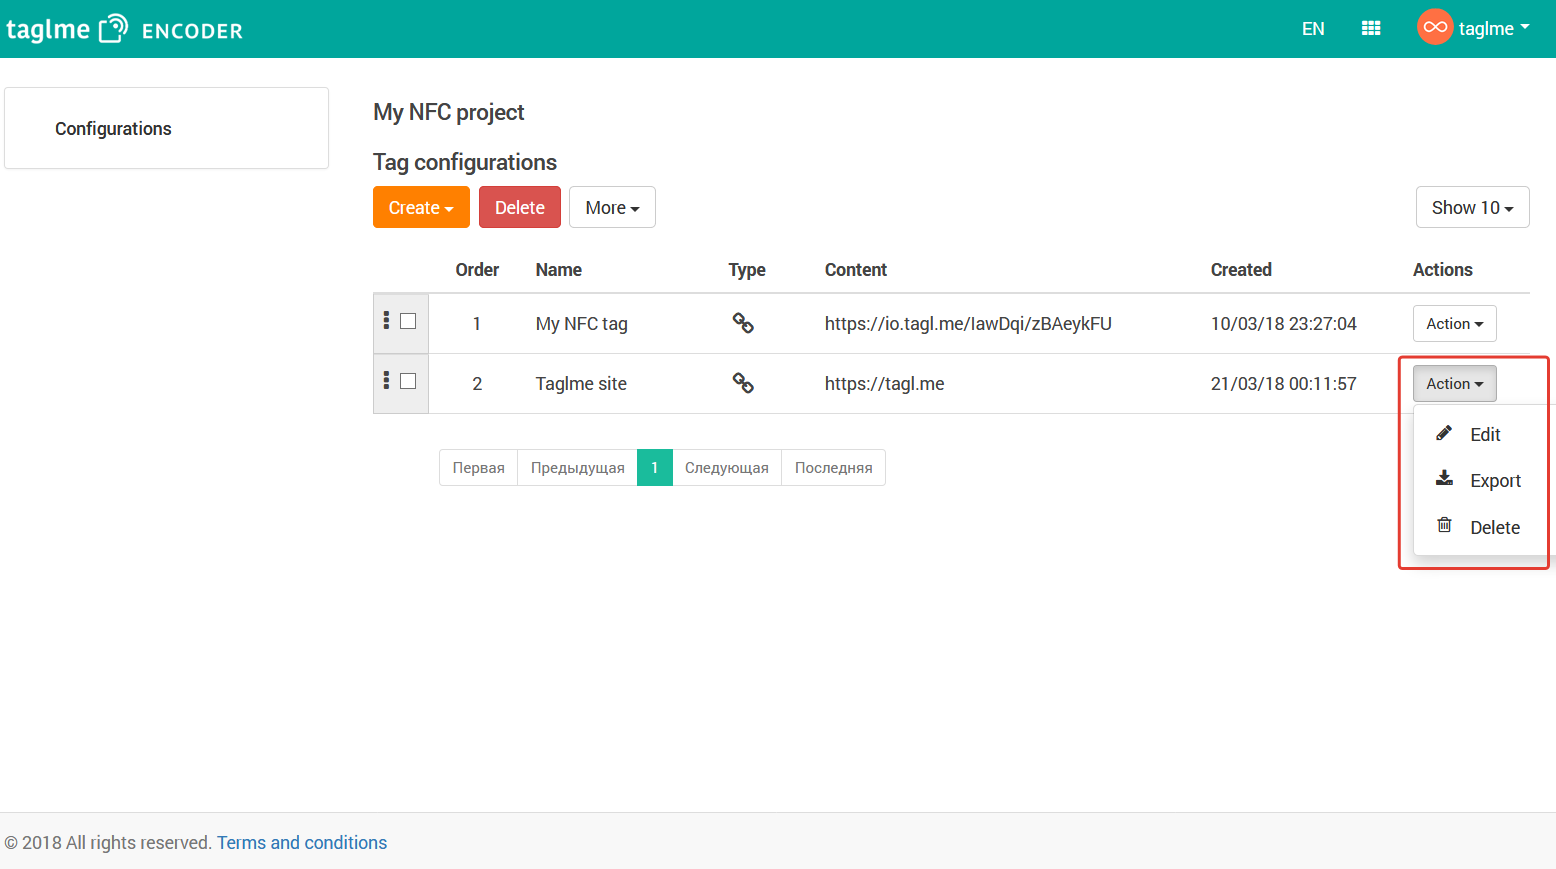
The newly created configuration appears in the list.
You can view the contents of the configuration by clicking on its line. To edit or delete a configuration, you can use the ‘Action’ menu which appears on the right side of the line.
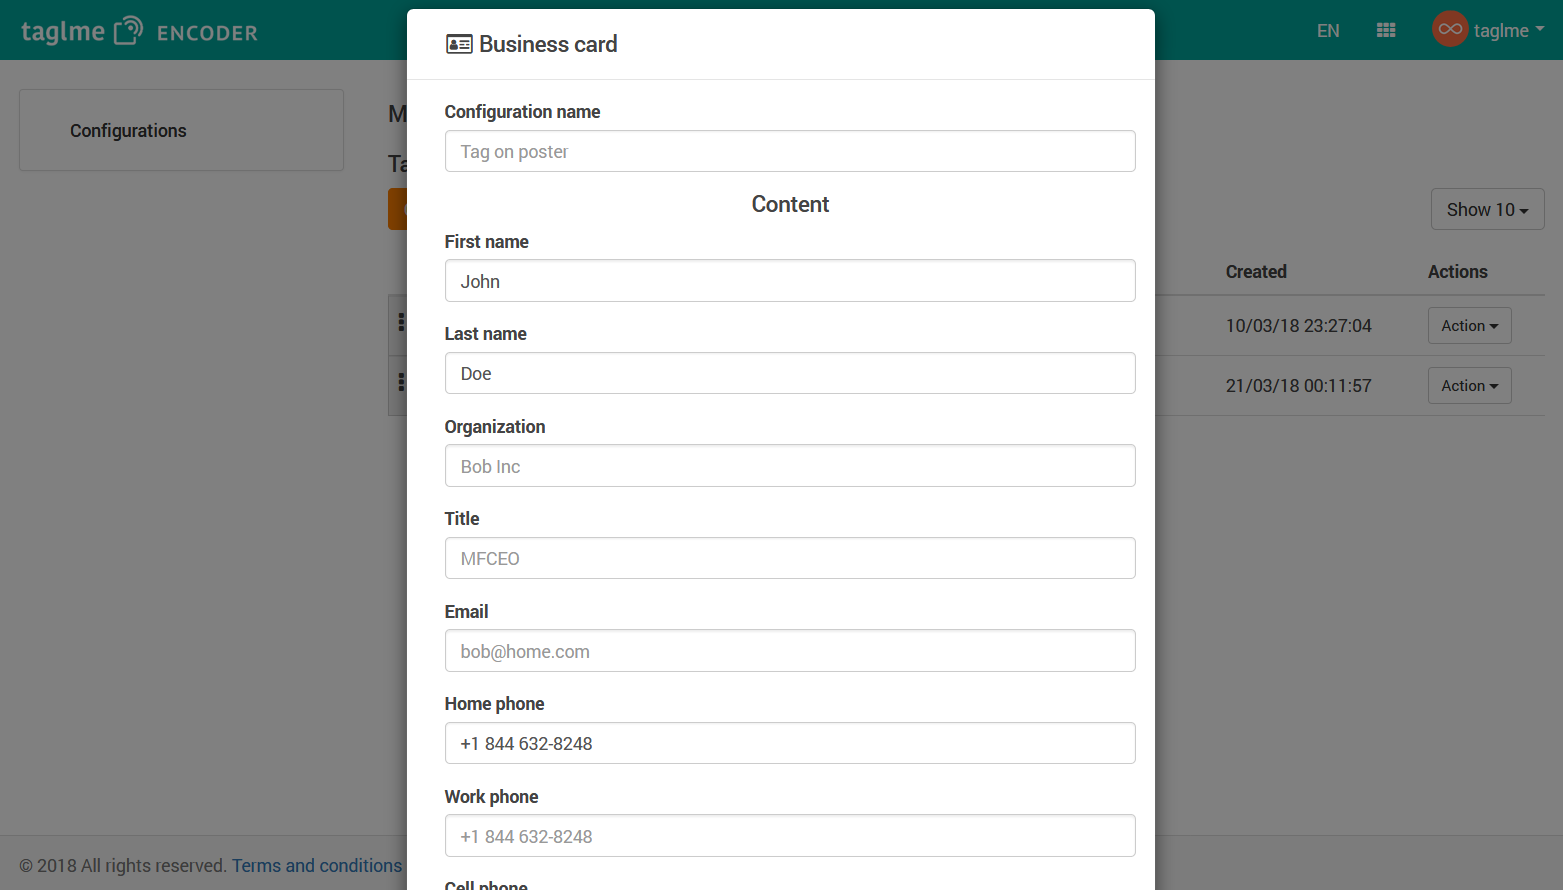
To create another configuration the same way, choose the ‘Business Card’ option.
Enter the Name, Surname and Work Phone number in the appropriate fields. Within the encoding options, specify that you need 1 copy and that you do not need to block the tag from overwriting it.
Click the ‘Save’ button.
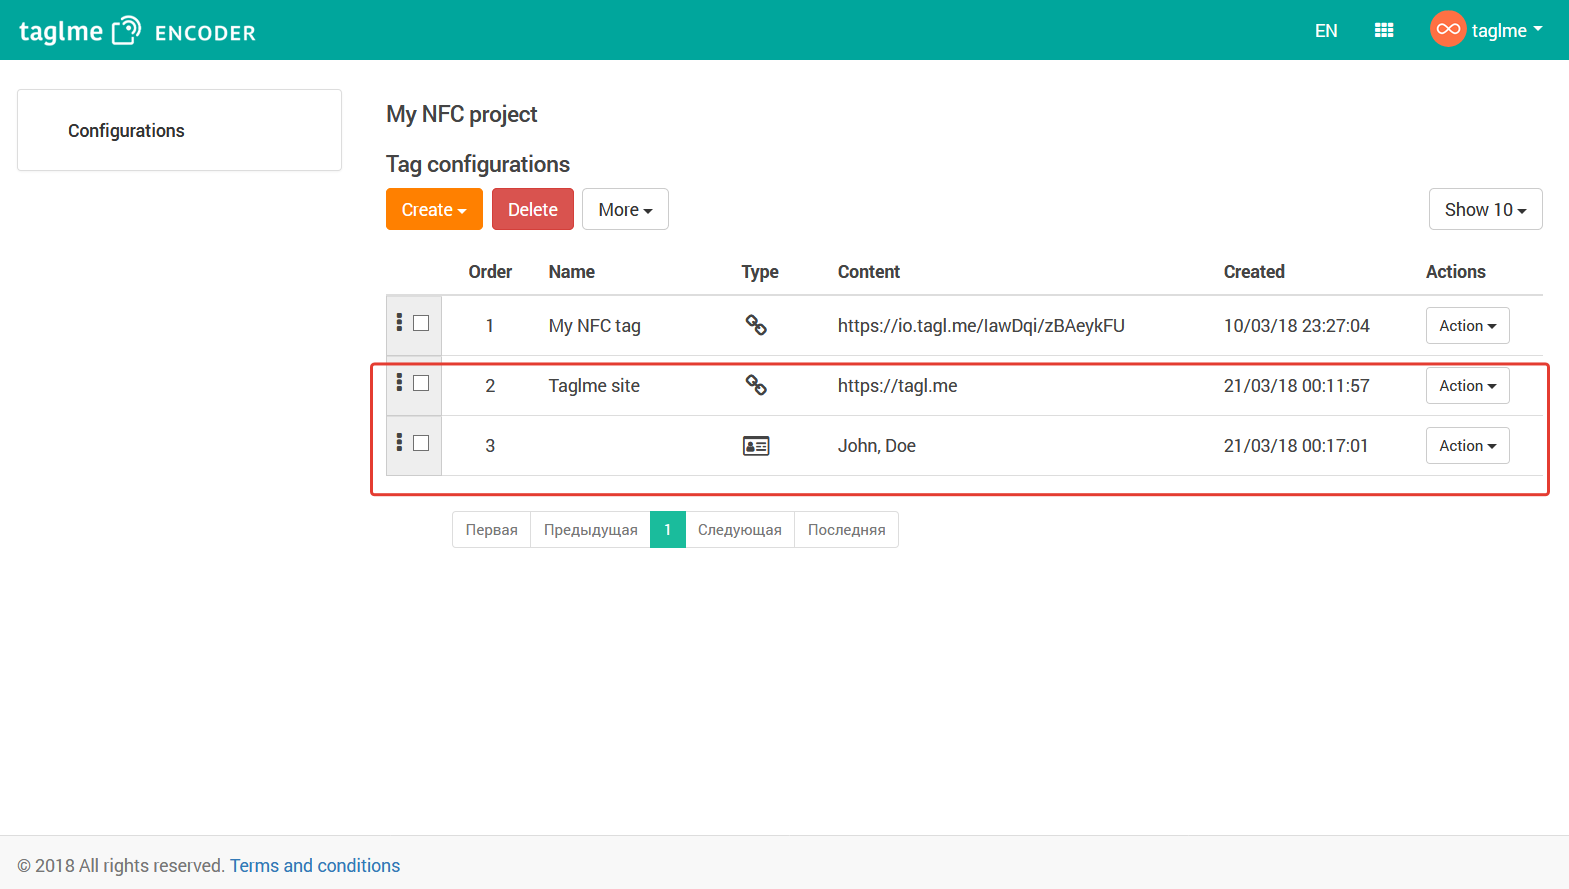
The second configuration also appears in the list.
Now you can open the mobile Android application Taglme NFC terminal to encode NFC tags.
Install Mobile Application
NFC tags encoding is performed using the mobile Android application Taglme NFC terminal.
To install it, open Google Play Store and type “Taglme” in the search bar.
Go to the Taglme NFC terminal application page and install it on your smartphone.
Encode NFC Tag
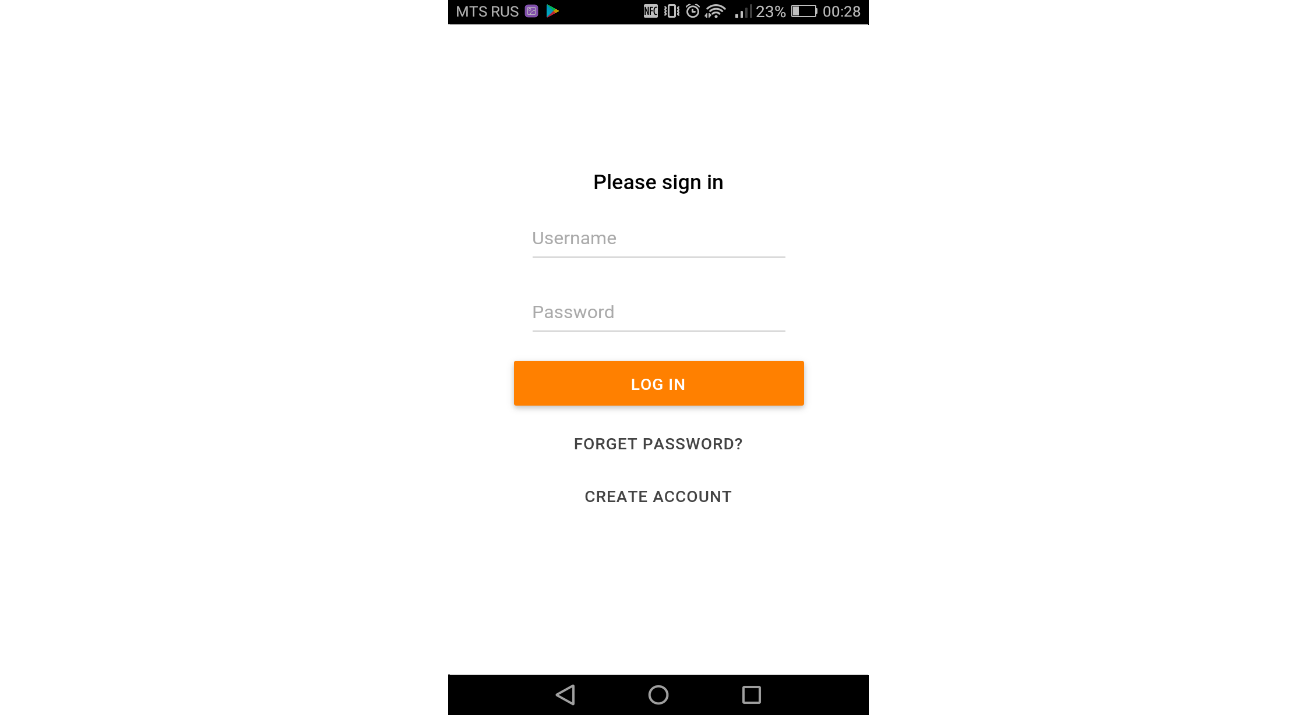
Launch the Taglme NFC terminal mobile application on your smartphone.
If you log in for the first time, you will need to enter your E-mail and password. It is the same as the one you used to log into the web application.
A list of groups created in your account will appear on the start screen. There is a group that you created on the web application, using previous steps from the manual (sections 1-4). Tap on this group item in list.

A screen appears with a list of configurations created from previous steps using the web application.
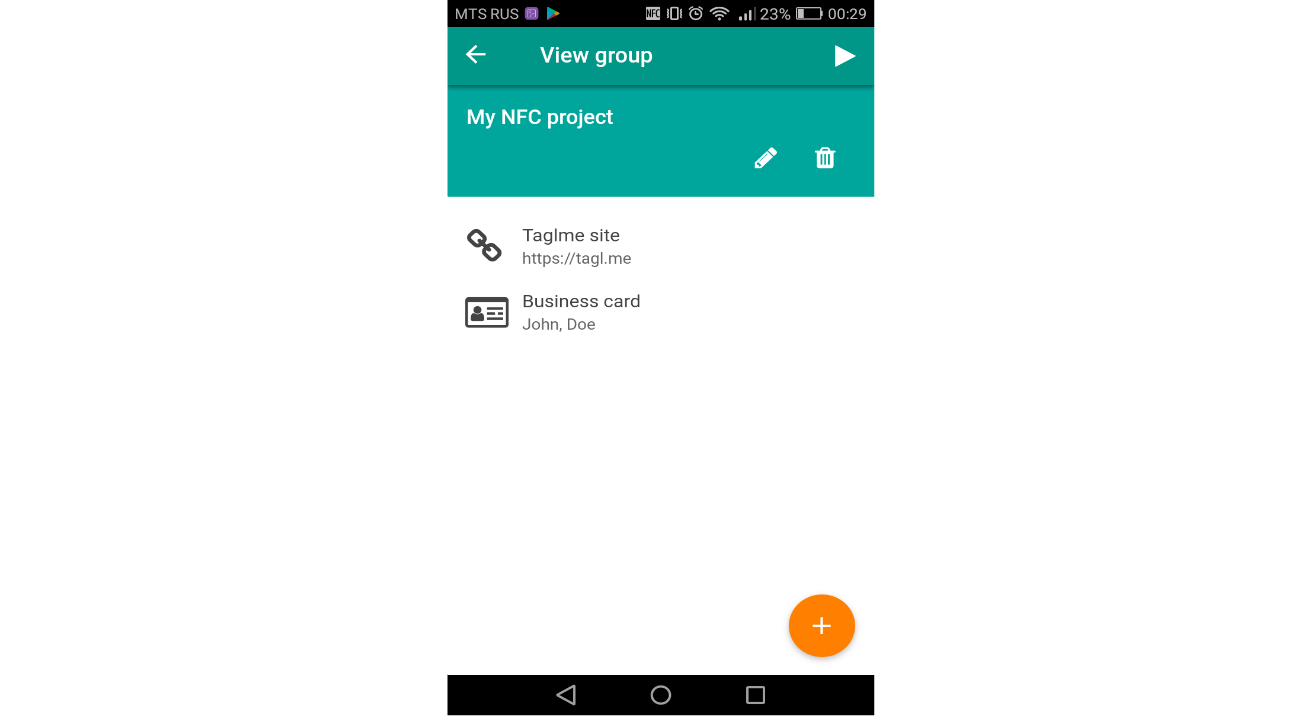
With the mobile application, you can also create, edit, and delete groups and configurations of NFC tags.
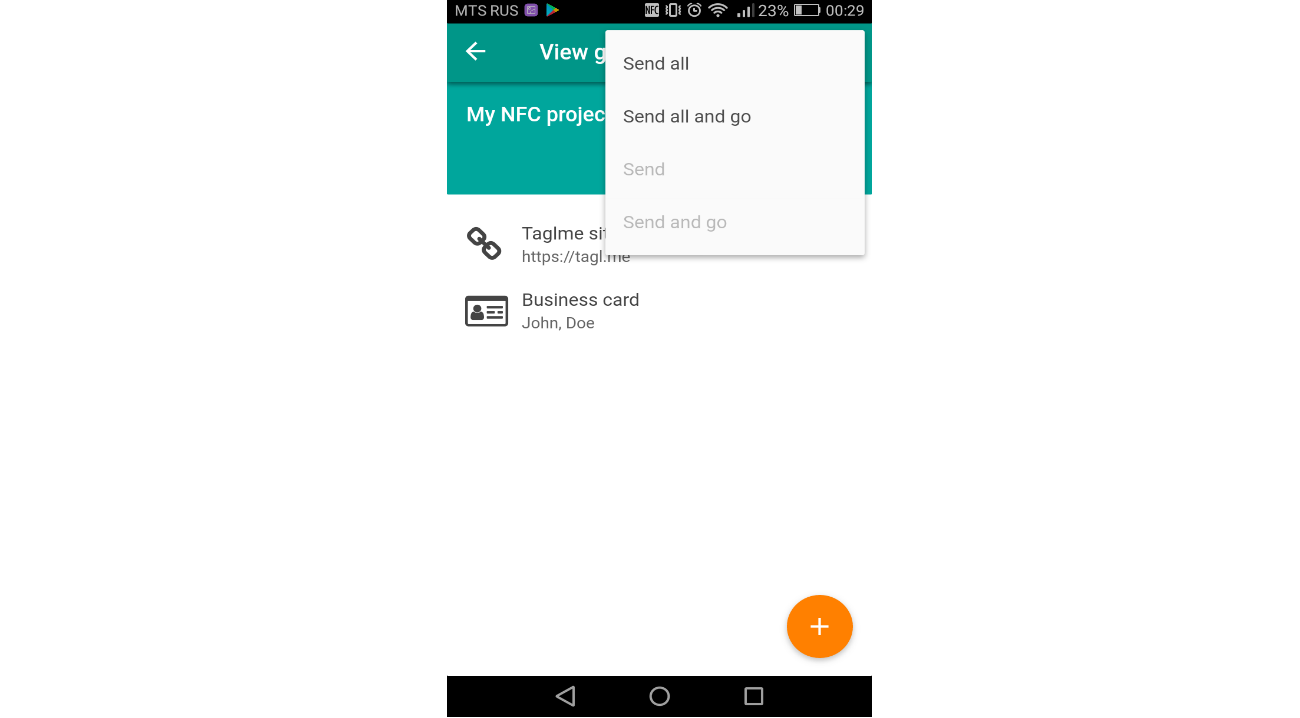
Click the ‘Start’ button on the top toolbar of the screen. When the menu list appears, select “Send all and go.”
The terminal window opens. The terminal is similar to what appears when a queue of documents are waiting to be printed, but in this instance, its purpose is to encode NFC tags.
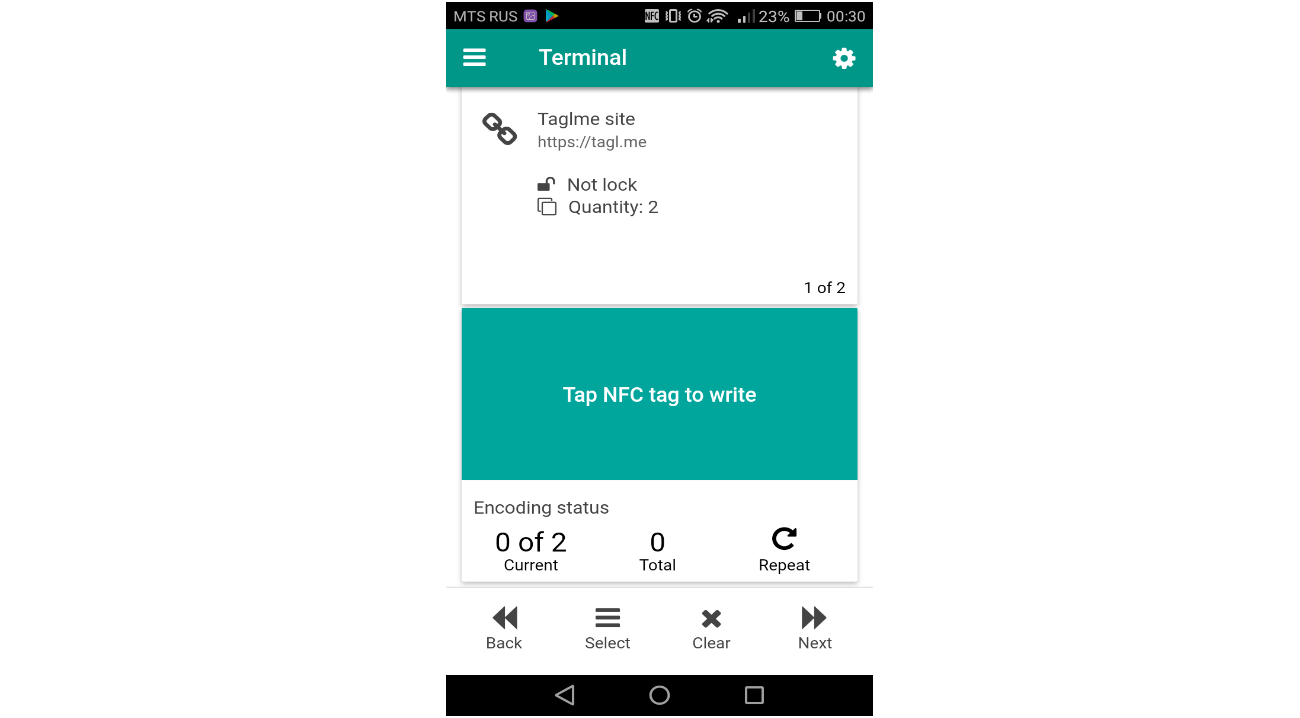
Configurations that need to be written to tags are sent to this. You should then only tap NFC tags one by one in order to encode them. The configuration is deleted from the terminal (queue) after the required number of NFC tag copies are encoded.
Configurations sent in the previous step will be in the terminal (queue).
Take 3 NFC tags and tap them one by one on your smartphone. After you touch each NFC tag, a message appears indicating that the record was successful.
After encoding all 3 NFC tags, the message ‘Empty Terminal’ appears. This means that all configurations are written to NFC tags.

To test the encoded NFC tags, close the application. Tap each encoded NFC tag on your smartphone.
When you touch tags with a record such as a ‘URL Link’, a web browser will open and the web page recorded on the NFC tag will load.
When you touch the tag with a ‘Business Card’ type record, the Contacts application opens. The entered data will be displayed along with the possibility to import the contact.
More detailed instructions can be found in the User Guides and Tutorials section.